This is the first in a Five Part Series – How To Insert And Center An Image In A WordPress Sidebar Widget showing you how to do some of the everyday tasks with WordPress using basic HTML code.
This first post will show you how to insert and center an image in a WordPress sidebar widget using some basic HTML code.
Let’s say we want to add this image into our sidebar…

These are the steps to follow to do just that:
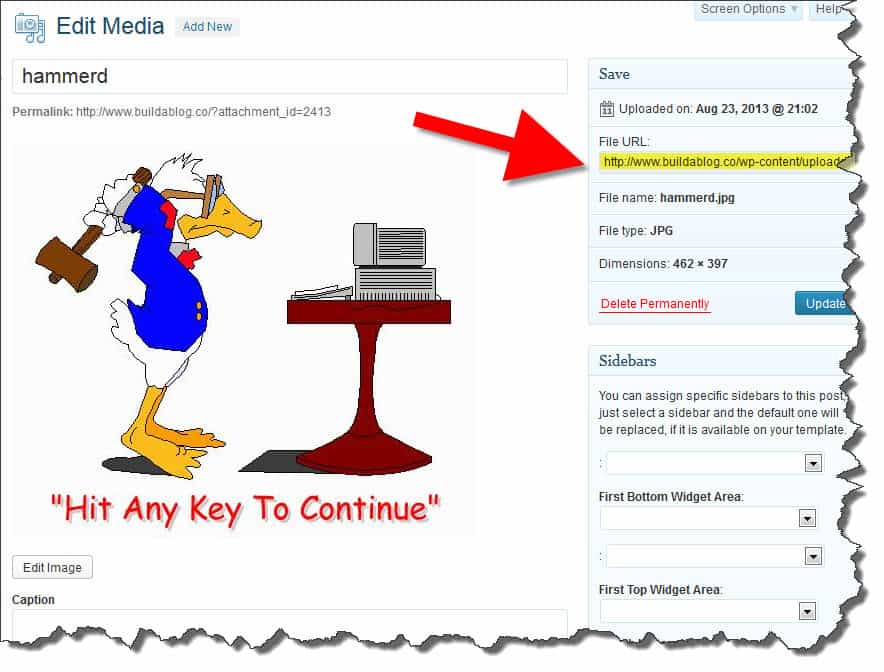
Step 1: Upload the image using the Media >> Add New tab in the left hand sidebar of the dashboard.
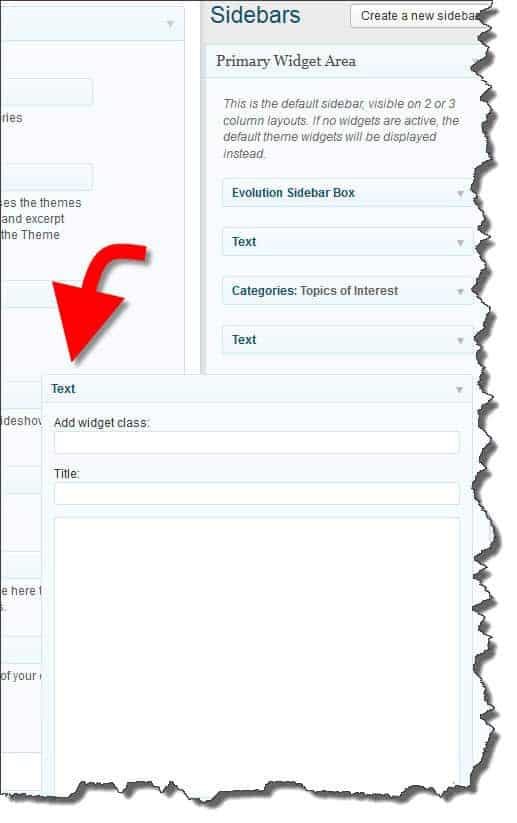
Step 2: Go to Appearance >> Widgets and drag a new ‘Text” widget across to the sidebar.

Step 3: Go to the Media Library and click on the file name of the file you wish to add. Copy the File URL

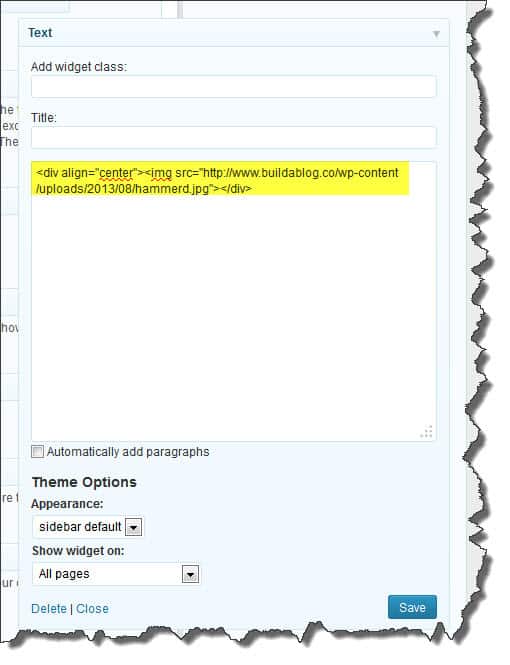
Step 4: Go back to the Text Widget you just added and type the following:
[html]
<div align=”center”><img src=”Paste the URL you copied in Step 3″></div>
[/html]
…and click Save.

Step 5: Visit the WordPress blog and refresh the page and you should see your image installed in the sidebar and aligned in the centre.

Things To Remember
1. Your image needs to be smaller than the width of your sidebar, otherwise, it will overhang the edge of your blog. If you need to resize the picture you can add the following to the code to specify a certain size.
[code]
<div align=”center”><img src=”Paste the URL you copied in Step 3″ width=”250px” height=”250px”></div>
[/code]
[If you need to resize your picture you can use an online resizer such as Pic Resize]
2. Make sure you have matching pairs of <> and ” “. If you miss one it will make things go a little screwy!
The next post in the series will be How to manually add a link in a widget using HTML code.
If there are any topics that you would like to see included in this series that require the use of HTML code please let me know in the comment box below.


